Last week I talked about how I tried to build a prototype flash trigger. One of the skills that I lacked was how to solder. My dad used to fix TV’s for a living and I thought how hard could it be? It isn’t that hard, but you’ve got to know what you’re doing. There’s science and art behind soldering. There are many tutorials on the net, but I thought that I’d add one of my own. This is one of the skills that they didn’t teach me in high school and university.
I thought that I’d do this in one go but it turns out that a detailed tutorial is better done in parts.
Equipment
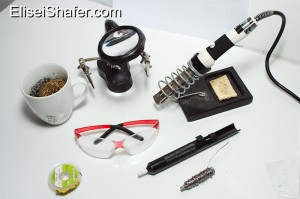
Bottom:Solder wick, safety glasses, solder sucker solder.
- Safety glasses.
- A temperature controlled soldering iron.
- Rosin-core solder
- Wet sponge or brass sponge.
- A solder stand.
- Solder wick or solder sucker aka solder pump.
- Third hand aka helping hands. Not as essential, but highly recommended.
Links
If you find my post useful, please consider supporting my website using these links:
- Hakko Soldering iron – an excellent choice for beginners, better than the one used here.
Safety
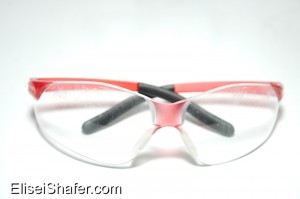
Wear your safety glasses! Irons get hot and whatever you’ll be soldering will be pretty close to you. Plus solder sometimes spews out tiny balls when you heat it.
Solder in a well ventilated area. Solder fumes are hazardous; They contain lead and rosin that are harmful. You can also get yourself a fume extractor with a carbon filter if you solder a lot.
Use a solder stand. Again, irons are hot, which makes them a fire hazard.
Temperature controlled soldering iron
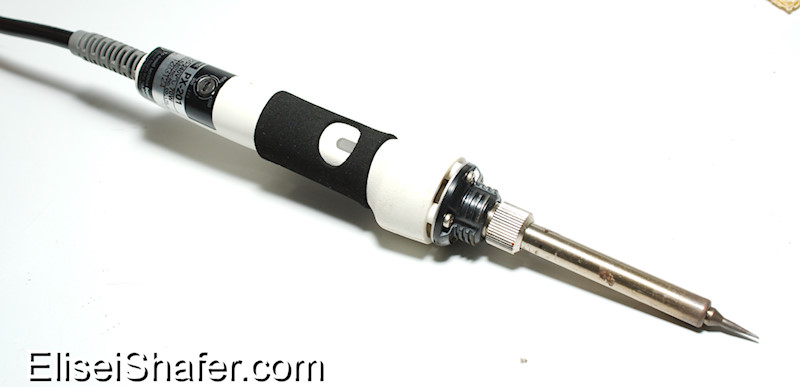
Why temperature controlled? If you get a cheap iron that has no temp control the tip will get heated to a temperature much greater than the melting point of the solder. You want your iron to be a bit hotter than the melting point of the solder otherwise your iron tip will start getting oxidised really fast which means your iron won’t transfer heat at a good rate, i.e. it won’t melt solder. Other things to look at when buying a soldering iron:
- Soldering Station or . If you have the space and money , get a soldering station. If you don’t have the money and space or/and you’d like a more portable system you can get an iron with a temperature control dial built in. I bought a soldering iron without a station because I’m a student short on money and space.
- Wattage: I read that 15-40W is enough for electronics, more than that you can damage components. If you use a temperature controlled iron you can get away with more (mine’s 70W) . I’d go for a higher wattage so long as there are tips available for finer work. If you get a weaker iron you may not be able to solder bigger components like connectors or PCB pads with higher heat mass.
- Look at the tip a flat or round tip should be ok. Also check the availability of tips. You don’t want to buy an iron only to find out later that there aren’t any replacement tips!
Solder

There are many types of solder available, there are variations on alloys, fluxes and number of cores.
- I use 60/40 solder. 60/40 refers to the percentages of tin and lead, respectively, in the solder. Lead solder is being phased out of commercial products because of health concerns and regulations but I’ve heard that its easier to work with. Lead free solder typically has a higher melting point which means that you’ll need to heat components to a higher temperature and that in turn increases the chance of damaging them.
- Flux removes the metal oxide off of the components you’re soldering. If you don’t have flux then your solder won’t stick and will ball up. You can get rosin core solder or one of the newer water based fluxes.
- Core refers to the number of flux cores in the solder. There are multicore solders available, but personally I use 1 core solder, it works for me.
Sponge

You’ll need you clean oxidation off of your tip before you solder a component so that the joint will be clean and to have better heat transfer. Wet sponge or brass sponge (brass shavings), your choice, both of them work. There are many an argument on the net about which one is better, uses, etc.
Solder Stand
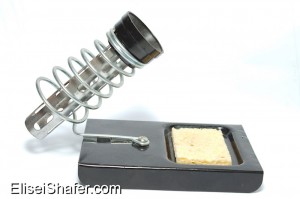
If you buy one of the more expensive irons you’ll probably get a stand included. Cheaper irons don’t come with a stand.
I’d get a stand where you can’t touch the hot part of the iron by accident. A lot of stands come with a place to put your sponge so look out for those.
Solder wick and Sucker
If When you make a mistake soldering or if you want to recycle components from your old radio/TV you’ll need a solder sucker or wick.
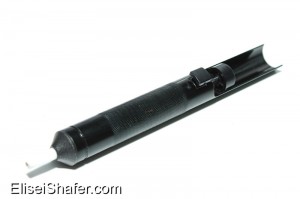
A solder sucker has a spring loaded mechanism that when triggered sucks up your molten solder. Good for through hole components.
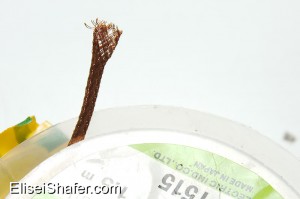
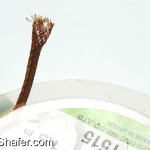
A solder wick can be used for smaller components and whenever you’ll want to clean up a mess. It’s basically braided copper wire treated with chemicals. It works through surface tension and wick up your mess.
Helping hands
![With these hands you'll be able to solder wires without frustration. The magnifying glass will help when soldering smaller components =]](http://eliseishafer.com/wp-content/uploads/2014/01/IMG_9321_1-199x300.jpg)
This will hold the things that you’ll want to solder in place. Say for example you want to solder two wires then you’ll need to hold both the wires, solder and iron, four things you’ll need to hold! That’s where helping hands come in. They hold the wires for you so that you can focus on the soldering.
Next week we’ll learn how to use these tools =D
Feel free to email me and leave comments.
Here’s a gallery with bigger photos.


![With these hands you'll be able to solder wires without frustration. The magnifying glass will help when soldering smaller components =]](http://eliseishafer.com/wp-content/uploads/2014/01/IMG_9321_1-150x150.jpg)

